In preparation for the release of our latest Tessuti Pattern - Valerie Top. I thought I'd post a step-by-step tutorial on how to sew and join together bias binding.
In our latest patterns we've recommended using a double fold bias binding (cut in self fabric). This is similar to double-fold french binding that is used to bind quilts, but for garments the binding is much narrower. Obviously this sort of bias binding sewn on the double, only works in finer fabrics like lightweight cottons, linens, silks etc. I love this method of binding, it's easier and gives a nicer finish. It can be used for narrower inside edge binding (as shown here) or for wider bindings to edge both the inner and outer garment.
Note: The binding strip used for this top is 1 and one quarter inch wide to finish 3/8" wide.
IMPORTANT: Cut your bias binding strip ends at 45 degree angles and ensure that both ends are cut in the SAME direction. Note: bindings are cut longer so you will need to check measure bindings around armholes before cutting off any excess.
Press binding in half lengthways (wrong sides together), taking care to stretch slightly when pressing and making sure raw edges are flush. Note: when the binding is pressed in half the angled end will be shorter on one side (see image above).
Continue pinning other side of binding end to overlap pin point (1) and place a pin (2) to correspond the position. Open up folded binding at point 2 and chalk mark position on straight grain of binding and at the same angle of bias end. Cut on chalk mark 2 only.
Unpin angled bias ends only and unfold the binding so you join bias ends together. Take care not to twist binding ends.
Pin in place. Checking to overlap correctly so that when open to right side, bias is one continuous binding with centre fold and raw edges aligned.
Sew binding ends together, taking 1/4" seam allowance.
Press seam open.
Trim off seam protruding from right side of binding raw edges.
Repress joined binding in half and repin back to armhole.
Sew binding in place, taking 1/4" seam allowance.
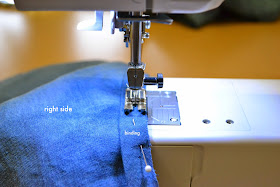
Turn binding out away from garment and understitch on binding near armhole seam, making sure to catch the seam allowance at the back.
Pin binding evenly around armholes on wrong side of garment
and edge stitch bottom edge of binding.
This will create the topstitch detail around the armhole on the right side of garment.
Hope you found this tutorial helpful. Happy binding friends!


thanks very much for this tute! I do have to say that maybe this particular fabric used was not the best choice for viewing right/wrong sides, markings and joins etc. but the instructions are clear. I like the vilene square tip too. Can I ask how much fabric is usually needed to make the binding?
ReplyDeleteHi Bronwyn,
ReplyDeleteThank you for leaving a comment. Yes you are absolutely right...bad fabric choice, but whilst making a top, I thought I'd photograph the binding process. Click on the images and you can see my text indicating wrong side and may even see a seam.
At some stage I'll replace with images on a plain fabric with contrasting thread...one of these days!
I squeeze in my bias strips in my pattern layout when cutting my pattern so can't give you exact amount, but when cutting bias strips in a contrast fabric I approx for 50-60cm . The bias strip in this pattern is 65cm long allowing for room to leave tails.
Great tutorial, thankyou. I have never been good at joining Bias binding. I will definitely try this next time.
ReplyDeleteThanks for very useful tutorial. Very nice pictures step-by-step.
ReplyDeleteQuick question about your bias tape, when you cut it and iron in half, do you open the bias tape when pinning it to the neck line or do you sew it to the neck line still folded in half then you flip it to the back side and stitch in the ditch? this making a really slim bias tape?
ReplyDeleteHi Stacy Dougan, yes you sew it to the neckline or armhole still folded in half and then flip to the back side. Note: The only time you will need to open up the bias tape is when you need to join the ends together, then you refold again when attaching it.
Delete